• Skip to primary navigation
  • Skip to main content
  • Skip to footer
Wisconsin Badger Camp

Wisconsin Badger Camp

  • Camper Registration
  • Contact
  • Badger Camp 1966 Event
  • Donate
  • About
    • History
    • Mission & Philosophy
    • Facilities
      • Grounds
      • Cabin Rentals
    • Staff
    • Photo Gallery
    • Annual Report
  • Programs
    • Summer Programs
    • Application and Forms
    • At Home Activities for Families
  • Employment
    • About Employment
    • Staff Applications
    • Volunteer
  • Ways To Give
    • Donor Advised Funds
      • Building Fund
      • Campership Fund
      • In-Kind Donations
      • Other Grants
      • Wish List
  • Online Camp Store

Uncategorized

Painting with a fly swatter

July 20, 2020 By wibadgercamp

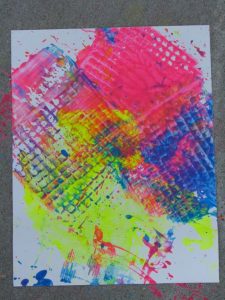
So seeing as it is the time that there are a bunch of flies on camp this week because apparently it is fly breeding time, We have decided to paint with fly swatters since there are a bunch of fly swatters laying around. Nothing like coming up with a fun new way to paint!

Size of group: 1-10

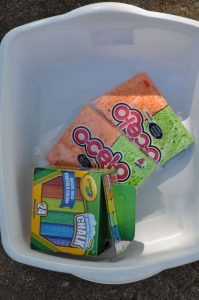
Materials needed: Fly swatters, paint in many different colors, paper, canvas (optional)

Objective: Gross motor skills. Color recognition, Creativity

Directions: This activity is pretty easy and straight forward. You want to tape your paper onto a table or a wall. It is good to have different blobs of paint on either a paper plate to where you can either softly dip your swatter into it or you can take a paintbrush and paint a few sections of the swatter different colors and shapes so they show up on the paper. Something fun to do is to tape a little fly that you print out onto the paper and it gives the painter somewhere to aim and hit the paper.


Image thanks to http://nashvillepubliclibrary.org

Filed Under: Uncategorized

Frisbee Tic Tac Toe

July 7, 2020 By wibadgercamp

This is a game from your childhood that you will never forget. Now we’ve enlarged it!

Size of group: 2

Materials needed:

  • 10 Frisbees
  • Rope, PVC Pipes, a sheet, Tape, or any one of these things to create the grid.
  • tape for the x’s and o’s

Directions:

Place an X on 5 of the frisbees and an O on the other 5.

Lay a grid out that has 9 squares in it. (see picture for reference)

Now flip a coin to see who goes first and stand 5 ft away from the grid and two your frisbee into the game and land it on a square. Then take turns going and the objective of the game is to get 3 frisbees of the same symbol in a row.

Filed Under: Uncategorized

Milk Carton Birdhouses

July 7, 2020 By wibadgercamp

Picture thanks to- https://www.fancymomma.com/

We have made our bird feeders before, but we haven’t made a birdhouse this summer yet so here it goes!

Size of group: 1

Materials needed:

  • Milk Carton
  • Scissors or Exacto Knife
  • Acrylic Paint
  • Stick/Twig
  • Small rock or weights
  • Creativity
  • String
  • hot glue gun/glue sticks

Objective/outcome: Fine and Gross Motor Skills, Appreciation for nature, Project Completion, Project Enjoyment

Directions:

First, we start by finishing a jug of juice or milk in the carton containers. Rinse the jug out and let it air dry with the top off of it. Once it is dry, cut out a round 2″ hole in the middle of the container. This is the hole in which the bird will enter the house.

Once the hole is cut, it is time to paint. Put a cover layer of black or white on the whole things so you can paint on top of it without the carton’s designs getting in the way. Let it dry.

After it is dry paint it whatever design you might want to do and let it dry again.

Once this is finished drying then you can start to put finishing touches on. The stand that the bird will stand on can be from a wooden dowel or a twig gotten from outside. Cut a small hole directly under the large entryway hole. Poke the twig or stick through and hot glue on both sides of it and let it dry for a few minutes while cutting your string to the desired length.

Once that has dried, in the top corners of the carton, poke one hole on each side. This will be where the strings go through and you can hang the birdhouse up. Put one end of the string through on each side and tie around the hole.this will help it hang evenly instead of a single hole in the center.

Once this is done the last step is to insert little rocks into the bottom of the birdhouse. this will help it from swinging around when hanging and will weigh it down. Gluing them to the bottom is not a bad idea either!

Find the Post I used for the pictures below. This is also a great idea for birdfeeders too!

DIY- How To Turn A Milk And Juice Carton To A Bird Feeder

Filed Under: Uncategorized

Stained Glass Chalk Art

July 7, 2020 By wibadgercamp

Picture thanks to- http://www.PhilandMama.com

Check this out!

Check out http://www.PhilandMama.com for the tutorial videos and other great activities for home!

We have all drawn with chalk before and this isn’t much different but this time we will create work of stained glass beauty with our chalk.

Size of Group: 1-any

Materials needed:

  • washable outdoor chalk- Bold Colors work best

  • a larger paintbrush and some water

  • any type of masking tape

  • a scissor (optional)

Outcome/Goal: This activity is great for helping to see if someone can count and identify and sort the shapes, name the colors they use, create a work of art, and work on fine and gross motor skills.

Directions:

First we need to lay the tape down in different shapes and sizes that all connect to each other. Starting with a “frame” works best and creating smaller shapes inside is the easiest. Think about some of the most beautiful stained glass windows you might have ever seen and all the different shapes that they consist of. Squares, triangles, rhomboids, rectangles, and other shapes should all be present and possibly work on identifying all of these within the design.

Once your tape is laid out, it is now time to color in all of your squares with different colors! Be sure to press hard and color in all the shapes. Once each shape is colored in, take your paintbrush, and get it damp. You don’t want it to drip everywhere when you take it out of the water. Paint over each shape making sure not to mix colors unless that is a look you’re going for.

Taking breaks during this activity might be good to stretch while someone is not usually used to crouching for so long.

Once done with the coloring and wetting of the chalk, you are now finished and it is time to remove the tape. Be sure to sound us some pictures of the masterpiece you just created!

Filed Under: Uncategorized

Stay safe in the sun coloring sheet

June 29, 2020 By wibadgercamp

Thanks to eParenting this is a simple but educational coloring sheet to share with everyone! Find the sheet here http://www.eparenting.co.uk/colouringpages/sun_safety_colouring_picture.php

Filed Under: Uncategorized

Sponge Darts and Outdoor Fun

June 29, 2020 By wibadgercamp

Seeing as the heat always finds its way back to us, here are a few ways to possibly cool down this summer!

Size of group: 1-10

Materials Needed: Bright Chalk, Bucket, Sponges, and clothes you don’t mind getting wet!

Directions:

Start by Drawing a simple target on the ground. (Can be simple or have score values) Now draw a line in which the throwers cannot pass to throw so everyone has a fair opportunity. A Bucket should also be placed at the line. All participants take turns throwing their sponges into the target area and add up the points. Each participant should have three sponges of one color or just use one set of sponges for everyone and keep track of them. You can add different variations to any game such as throwing it into a bucket or through something.


Variation # 2: Another game to play is sponge toss. Sponge toss is where you set two buckets about 6 to 8ft apart. One participant stands on the far side of the bucket looking at each other. On each side the buckets are filled with water. One side starts off by having the sponge on their side and begins by throwing it to the other person. The objective of this game is to get each other very wet while also making it so the other person drops the sponge when it is tossed to them.

Variation # 3 of sponge toss is a life-size human target. This involves someone standing/Sitting in the middle of the lawn and the main goal is to hit this person with a sponge from about 10ft away. This should not be done by throwing the sponge very hard but lighter so no one gets hurt. This is usually well-received when it is a camp counselor and or a house staff they are trying to get wet!

Images thanks to Theseasonedmom.com

Materials Needed
Target

Filed Under: Uncategorized

  • « Go to Previous Page
  • Page 1
  • Interim pages omitted …
  • Page 4
  • Page 5
  • Page 6
  • Page 7
  • Page 8
  • Interim pages omitted …
  • Page 14
  • Go to Next Page »
  • Home
  • About
  • Programs
  • Employment
  • Facilities
  • Ways To Give
  • Privacy Policy
  • Cookies Policy
  • Contact

Footer

Main Office (open year round)

Wisconsin Badger Camp
PO Box 723
Platteville, WI 53818
Phone: 608-348-9689
Fax: 608-348-9737

Camp Office (open June 1 – August 20)

Wisconsin Badger Camp
11815 Munz Lane
Prairie du Chien, WI 53821
Phone: 608-348-9689
Fax: 608-348-9737

Follow Us

 Twiiter  Google

Wisconsin Badger Camp © 2025 webwisedesign.com

Powered by Ultimate Auction